Friday, July 22, 2011

5 Ingredients, 4 different Ways!

Chicken Salsa

This is a tasty meal that can be throw together in just minutes. 
 After My Princess # 2 was born my sweet friend Michelle
 emailed me a ton of quick & easy recipes. One
of which, was Chicken Salsa and it called for chicken breast
and a jar of salsa. It was great just like that, but I wanted
to add some veggies.  It's kinda like chicken tortilla soup, but why
stop there?!  You can eat it as a soup, on pasta, on rice, or in a wrap.
5 Ingredients that can be made 4 different ways!

Ingredients:
Tyson Boneless Skinless Chicken Breast or tenderloins
1 jar Salsa
1 can black beans
1 can corn
1 can chicken stock

*Optional toppings:
Tortilla Wraps (can be buttered, sliced & baked in oven)
Sour Cream
Cheese
Avocado
*Optional sides: pasta, rice, wheat wraps

Instructions:
1- Place Chicken in slow cooker & top with remaining ingredients
2- Cover & Cook

To be honest, I don't really worry about how long it cooks.  Anytime I use
my slow cooker, I just place everything in the pot in the morning and forget
about it until dinner. Easy Right?!

I hope you enjoy!


Sunday, July 17, 2011

What do you love?

Do you love the simple things in life?
I sure do!

I also LOVE taking pictures of my 2 sweet girls!


 Eating under the table...This pic is priceless! I busted her at 7am hiding under the table eating a cookie. LOL! So, I did what any Mommy would do...I ran grabbed my camera:)
It's blurry, bc I didn't have time to change the settings on my camera & Once she spotted me,
she was out of there! LOL

 I'm not sure which Gabriella loves more... Sleeping with Hair dryers or Sleeping in a swaddler

Staring into space

Smiles for Mommy...I only captured 1/2 of her, because I was busy talking to her
& not looking threw my camera. LOL It may be only 1/2 of her,
but theres still so much cuteness I can barely stand it:))
Baby feet


Throwing Rocks


                                                        Sister Love:)) Oh! How I LOVE My Girls!


Sunday, July 10, 2011

You Won't Believe How Yummy!

Peanut Butter Chocolate Oatmeal Cookies
adapted from a Crafty Pod recipe


Ingredients:

3/4 Cup Wheat Flour
1/4 Cup Coco powder
1 Cup Oats
1/2 tsp Baking powder
1/2 Cup Butter, softened
1/2 Cup Peanut Butter
1/2 Cup white granulated sugar
1/4 Cup light brown sugar
1 Egg
1 1/2 tsp Vanilla extract
1/2 Bar deep, dark chocolate Hershey's Candy Bar

Instructions:

1- Preheat Oven to 375 degrees
2- Stir flour, oats, baking soda, baking powder
3- Chop up Hershey's Chocolate Bar & stir in mixture
(I have to admit, this is my favorite part!
It think it's because I use a big knife & I feel like a Pro. LOL)

4- In a large bowl, Beat butter and peanut butter until light & fluffy
5- Add Sugar, egg, & vanilla and mix well
6- Add flour mixture a little at a time
7- Spoon onto ungreased cookie sheet.
8- Bake 10 minutes
 
\
O, Yummm:))...Now, I want to go mix a batch together!

My family & I love these PBCO cookies.  I hope you do too!

Wednesday, July 6, 2011

Newest Addition

Newest Addition To My Family


I know it has been really quiet around here, but for a really wonderful reason.
My family & I have been busy welcoming (kissing, cuddling, & LOVING) our newest addition. 
I'm sure you can tell from the picture above that BiG SiS Loves her LiL SiS <3
Here are a few pictures from my new camera, that I'm still learning how to use.
LOL I know that soon I will have lots of opportunities to practice:))


Gabriella Reece
6lb 12oz 20 1/2 in
I know...BEAUTIFUL :)
Melt My Heart!

I hope you enjoyed my pictures of my 2 sweet girls.


Also, I thought I would share a few pictures my Mom took the day we left the hospital.
Which were taken when Gabriella was exactly 24 hours old!


Monday, July 4, 2011

Something Decorative, Yummy, & Fun....

Hi Everyone! 

Happy 4th of July!! It is my FAVORITE holiday!!
I am Delina from Dew This and I am so happy to be here guest posting today :)

I am a SAHM of two boys who enjoys just 'dewing' a bit of this and that

 I like to make decorative 4 x 4 tiles and just finished my 4th of July ones


I also enjoy baking - like yummy Fruit Pizza


Today I am going to show you my latest creation for kids!!

Planning on traveling this summer? We are a little bit and with two small boys trips can get long sometimes!!!

So I have created the perfect, quiet activity that you can take ANYWHERE!!

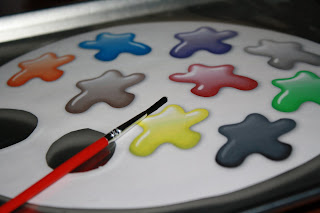
A Painter's Easel

perfect for painting your car, books, windows and anything your little artist finds!


Here is what you need:

File Folder or Cardstock
Laminate or Contact Paper (to make it last longer)
A paintbrush

Now head over here to print out the Easel template. 


Glue onto your file folder or  print on cardstock.

Laminate or cover with contact paper.

Grab your paintbrush and start to paint!!


This is a great imaginative play tool for home, school, dr. offices, car trips, you name it!

I hope you enjoy!!

Let me know if you are interested in a plain template that you can color yourself and I will get one to you! 

Hope you all have a great 4th of July!!


Thank you Delina for sharing some of your creative ideas with us!


Monday, June 20, 2011

Meet & Greet Jenn! & Wish her a Happy Birthday!

Please welcome Jenn!
I won an adborable dress for Adriana from her blog in April. I have pictures of Adriana helping Mommy bake while wearing it. (I will post a pic of her in it soon)

 Hello!  I'm Jenn from A Jennuine Life and I'm so happy to be visiting one of my favorite Jennifers here at My Mommy Can.


This post is coinciding with my birthday - 37 years today, and expecting my second daughter in 15 weeks.  It took me a bit longer to meet Mister Right, so I'm a late in life mother.  My first daughter Arden is a little over two and I think she's going to be an amazing big sister!


At A Jennuine Life, I share sewing projects, crafts, some DIY and recipes, and little snippets of life in our Michigan home.

A Jennuine Life

I was honored to be a participant in Project Toddler Runway, and my final project in the competition was my Every Occasion Dress.  It's an a-line dress with interchangeable aprons so it can be worn for different holidays or events.


I made a custom version of this dress as a giveway through the Spring Fling event hosted by April at Wildflowers & Whimsy.  Jennifer was the winner, and here is the version I made for her little girl!


The post about this dress with a bit of a tutorial can be found here.  I also have an Etsy shop, but it's in serious need of stocking - it's Jennuine Design and I sell pinafores and bibs and have plans to add some other designs soon!


I would be so happy if you would stop by my blog and say hello! Or, just leave me a comment. I love to meet new friends!
Thanks so much for having me, Jennifer!  I hope you and new baby are doing well, and I look forward to being in your shoes in a few months - you'll return the honor, maybe?


Monday, May 9, 2011

Meet & Greet Shawna & Learn to make something Silly!

Happy Monday!
Please Meet & Greet Shawna...


Hi everyone!!  I'm Shawna from A Very Dandoislion Life, and I'm thrilled to be here at My Mommy Can!!  Today I want to share a pretty cool project with you that is wicked easy and super fun for kids.  Silly Band Soap!

Over the last year I have amassed a very large collection of Silly Bands.  Don't judge me, I love the silly things.  Plus, I work with kids.  Anyway, I bought a bunch, traded some, and bought more at yard sales.  Then, I stopped wearing them.  I couldn't figure out what to do with them.  Then I had a great idea.  Soap.  I could put them in soap and sell them at our local yard sale day!

It's a very easy process.  Just divide up your silly bands.

Put them in your mold and pour in your soap.  I added some soap glitter and a few drops of orange scent to mine.
Then let them set.  Pop them out, and you're ready to wash up!
I love that some of them have silly bands sticking out.
Can you see the glitter?  I only put glitter in the "girly" ones. 
They're pretty big soaps, so they last quite awhile, and kids love using them. 
Many thanks to Jennifer for letting me pop in and share with everyone! 


Monday, April 25, 2011

It's Meet & Greet Monday! Please Meet Lelanie...


Hi, everyone! I am Lelanie, one of the 3 "L"adies behind
To Sew With Love

I am really excited to be guest posting for Jennifer today. I hope you don't mind if you don't get your daily dose of Jennifer's craftiness since I'd invade her space for a while^^)

We love sharing our crafting and sewing adventures (and misadventures ^^). Just recently, we have shared tutorials such as these:


We also host giveaways sponsored by our lovely sponsors, a Crafty Saturday Link-up Party, features on our favorite Etsy shops, and handmade love post.

Do you, like me, hold on to scrap fabrics knowing that you'll make something out of it one day? Well, last week, I made these from 1 yard of Michael Miller fabric (pink) and 1/2 yard of japanese cotton fabric (black).


summer dress


clutch


très chic ruffly summer dress


After I've made these projects, I still had less than half-meter of the pink fabric and a little more than a a quarter of the black fabric. So, I have decided to make a shirred tunic for my princess.


So, for this tunic dress I used:


2 pcs. 18" x 9" black fabric for top band of tunic
2 pcs. 12" x 4.5" for shoulder bands
2 pcs. 18" x 16" pink fabric
elastic thread, elastic band
black and white sewing thread


Get one of your top band (black fabric) and fold it in half, wrong sides of fabric together, place it on top of your pink fabric as shown above (both fabrics right sides facing together). 


You can pin them together before sewing or just sew right away keeping edges aligned as you sew a straight stitch 1/4" away from the edge.


After that, do a zigzag stitch or serge. Whichever floats your boat ^^)


Topstitch. Do the same to the other black and pink fabric.


So, you'll have two of these.


Get one piece of your tunic and let's start shirring by sewing a straight stitch but set your stitch length either 3.0 or 3.5. You will need to wind elastic thread in your bobbin for this. 


When your reach one end of your straight stitch, while your needle is down, lift the presser foot and turn your fabric 90º.


Sew 2-3 stitches depending on how long you'd want your stitches apart.


Turn your fabric 90º and you can start sewing again, using your presser foot as guide.


When you're finished, you'll have something like this. Do the same to the other piece. I would have used black elactic thread but I had none on hand. If you'd like your fabric to be more gathered, iron it (the other side, not the side where your elastic thread is or else, it will stick to your iron) with steam. The gathers will become closer to each other - magic!


Get both tunic pieces, place them wrong sides together and sew a straight stitch 1/8" away from the edge.


Iron or press with your nail.


Fold your fabric, right sides together and sew a straight stitch 1/4" away from the edge.


You've just made a nice french hem! Do the same to the other side.


Hem your tunic using your desired style.


Now, let's make the straps. With your fabric right sides together sew a straight stitch on both longer sides.


Turn and topstitch.


Sew 2 columns of straight stitches so you'll have a casing where you could insert your elastic band.


Insert your elastic and sew close each end. 


Do the same to the other shoulder band.


With some small scrap fabric, I made two bows, one on top of another.


Attach your shoulder bands to your tunic and the bow on the center. Now call your princess so she could try it on!


she wouldn't even look at the camera, eyes glued at the tv watching tinkerbell the movie!


Now, you have a nice summer shirred tunic for your princess! 

I hope you liked this tutorial. And do check our blog for more tutorials and free patterns.


Thanks a lot, Jennifer, for having us here today. We really enjoyed it!


Hugs,